Table of Contents
You may be surprised by knowing that 300 hours of video are uploaded to YouTube every minute and most of video not perfect either by audio voice or quality of recording so they just end up by below 100 views. Once you create perfect video then only you can create a YouTube channel and add AdSense to monetize youtube to make money online .
Not only for YouTube, you also require perfect video to be shared with your friends, students, colleagues or clients. Correct? So no worry we will help How to make a YouTube video perfectly using one of the best screen recorder camtasia. Before start steps of creating video let’s know what camtasia is?
Camtasia helps you to record on-screen activity, edit enhance your content, and share in high-quality to viewers anywhere. It is a standalone video player, optimized for playing screen recordings. It helps you to record a video of what’s on your computer screen. You can use to make your video lessons, tutorials or product demos.
Camtasia’s video editing tools, animations, and effects helps to make compelling videos from your screen recordings. So, you start with screen recording and ends with a compelling video.
Now we will see how to use the Camtasia software
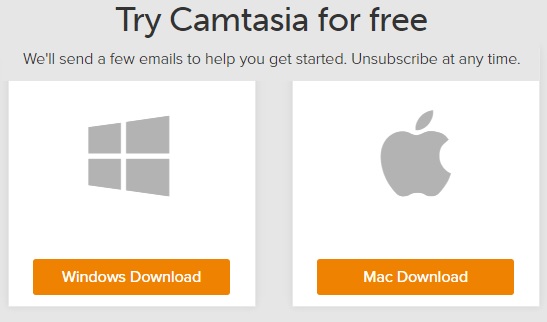
Firstly, download the software from the official site i.e. techsmith To start with you can download the trial version. You can download as per your OS configuration.Once you click then it start downloading software.
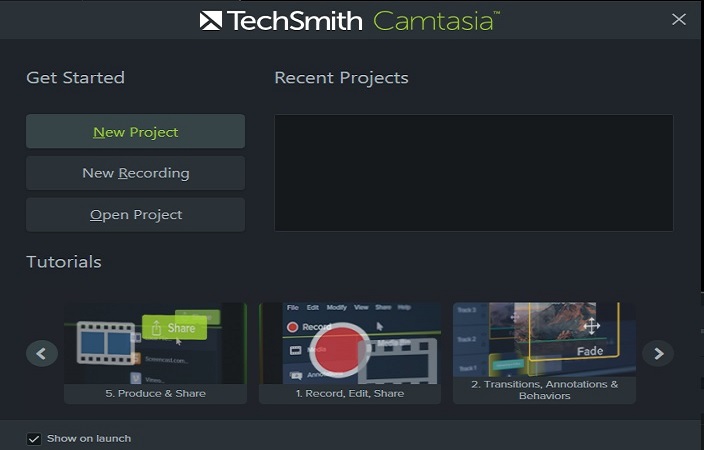
The Welcome window appears when you open Camtasia Studio. If you close out and want to reopen it, go to Help > Show Welcome Window.
In new version(9.0) you can see this screen . So just select new Project or new recording to show video recording tool screen.
In older version once you click on show welcome window then you will see below screen and all below given options.
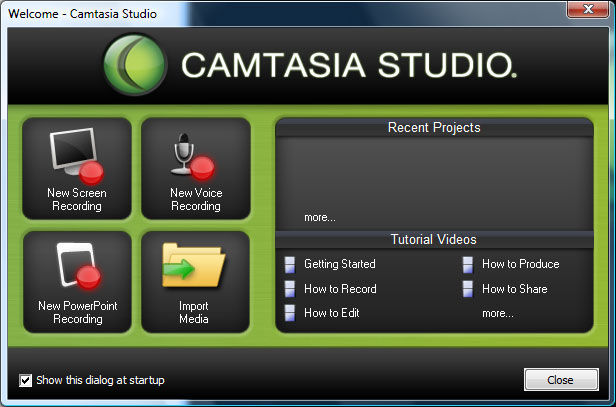
1. Record the Screen: Open Camtasia Recorder to record the screen.
2. Import Media: Select the video, audio, or image files to import into the Clip Bin.
3. Recent Projects: Displays the last three projects opened. To open another project, click the more… link.
4. Community: Click the left and right arrows to cycle through the online TechSmith community options. Click an option to go to that site.
5. Free Training: Click any of the options to access video tutorials, the help file, technical support, and PDF documentation.
Recorder: Then record that part of your screen which need, down to the pixel. With Camtasia’s precise crosshairs you can capture windows, regions, or your entire desktop. Recorder is designed to be simple and easy-to- use starting with your first recording—just click the Record button and begin your onscreen activity.

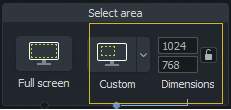
1. In order to start recording, the first thing you’ll do is select an area to record. By default, the full screen option is selected. Unless you plan on sharing your video to a location that requires specific dimensions for the size of your video, let it be full screen.
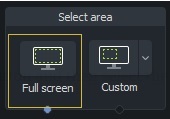
If you need to select a different area for recording, you can either click the Custom button and then select the area you want to record, or you can select a pre-set option from the drop-down list next to the Custom button.
2. Audio recording is enabled by default. To verify that your audio is ready to go, check to see that your Audio button has a green check mark.
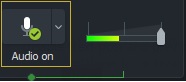
If you want to change your Audio input, select the appropriate device from the dropdown menu next to the Audio button. You can also uncheck the Record system audio option in this dropdown menu if you don’t want Camtasia to record the sounds that would normally come out of your speakers.
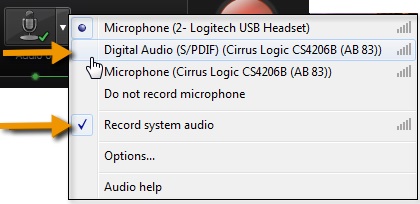
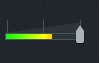
Check your sound levels by speaking into your microphone and adjusting the volume as needed.
3. Webcam recording is disabled by default. If you want to record your webcam as part of your video, click the Webcam button to enable webcam recording. When you’ve turned this on, you should see a preview of your webcam. You can move your cursor over this preview window to get a larger view.
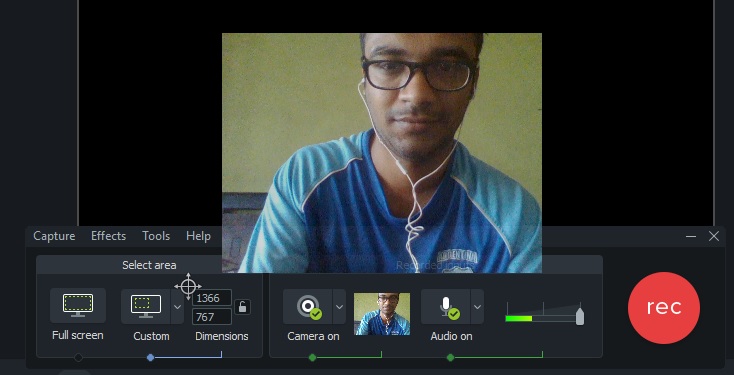
4. When you’re ready, click the red Record button. This will start a 3-second countdown. Once the countdown ends, everything on your screen and every sound picked up by your microphone will be recorded.

5. The easiest way to end your recording when you’re done is to press the F10 key, but you can also stop the recording from your taskbar.
6. Click Save and Edit to save your recording and open it in the Camtasia Studio editor.
Editing:-
1. When the Camtasia Studio editor opens, your video will automatically be added to your timeline. Before you start editing, you will be asked what size you want your video to be. You’ll usually end up with the best quality results if your editing and production dimensions are the same, so make sure you choose the dimensions here that you’ll use when you produce your video. The two Automatic suggestions in the dropdown menu are usually safe bets.
2. No matter how careful you are when recording your screencasts, there will probably be times when you’ll need to cut out a section where you made a mistake as you need to make a youtube video perfect. To remove any portions of the video, click and drag the playhead, select the area to remove.
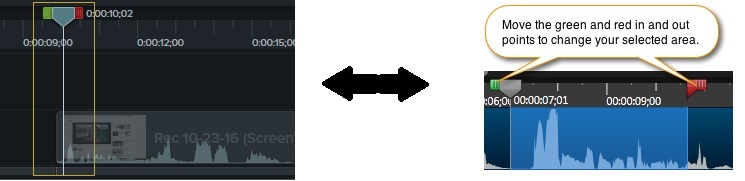
and click Cut (you’ll find Cut in the row of buttons directly above your timeline).
3. While you’re editing, be sure to save your project regularly so you don’t lose any changes. You can do this either by opening the File menu and selecting Save Project or by using the keyboard shortcut Ctrl + S.
(For Old tool)Steps to be followed to Produce and Share Directly to YouTube from within Camtasia Studio(for older than version 9.0 follow the below steps to save or share video otherwise in the new version you need to buy or video produce with watermark of TechSmith)
1. When you’re ready to share your video, click File > Produce and share.
2. Camtasia Studio offers many options for producing and sharing your video. For example, if you want to share it on Youtube, the following steps need to be followed:-
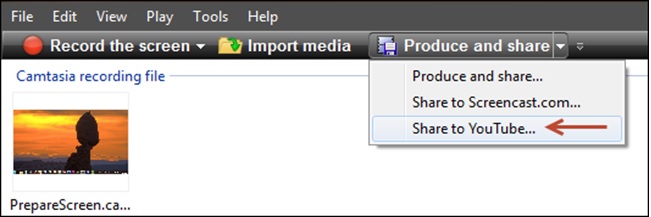
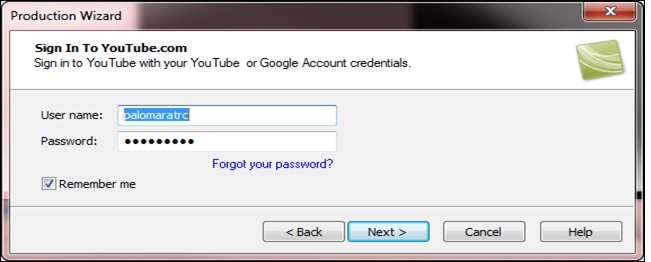
Within Editor, click the Produce and Share dropdown and select Share to YouTube. The Sign In to YouTube screen appears.
3. Enter your YouTube credentials. Click Next.
4. Give your video a title, choose the category, and select other YouTube options.
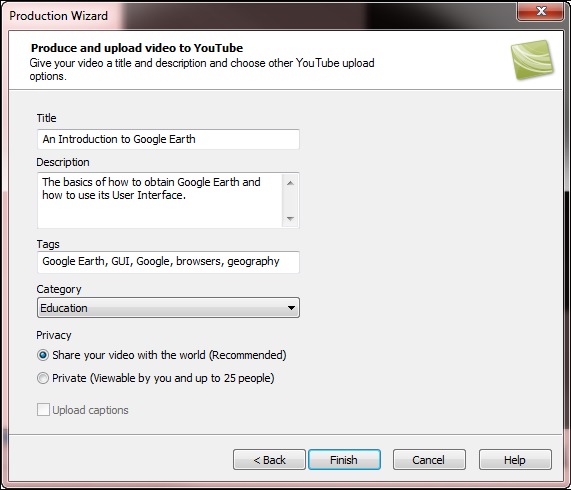
5. Click Finish. The video begins the rendering process.
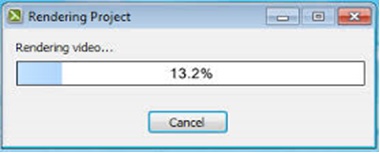
6. When rendering is complete, the video appears on YouTube and is ready to play.
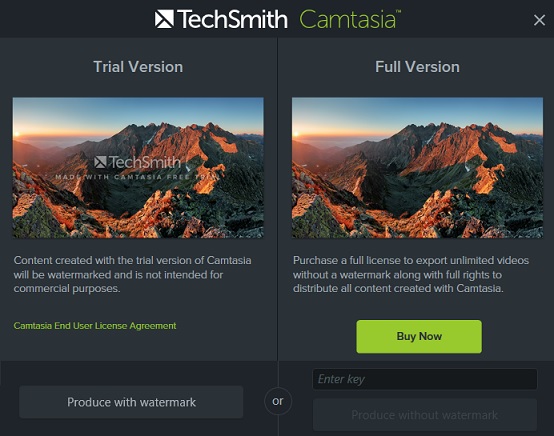
(For new tool) New tool allow you to share video on any channel or save in your local drive but add watermark in video.See below all channel list where you can share video.

Once you click on share then it give you screen like below. which ask if you want to share with watermark or go for buy full version from here camtasia full version.
Please also check: Video sharing sites other than youtube
Hope you like this blog post and if you having any issue in process of making a YouTube video then you can write me in comment..I am always available to help you out.
Thanks for reading.